We’ve been getting some awesome feedback on our monthly ‘Reels for Realtors‘ columns, so we figured, why not take a step back and give the Instagram Reel newbies the ultimate starter guide? We have all the goods to help you create quality content.
So first things first, what are Instagram Reels?
Reels are a short-form video feature on Instagram that allows users to create and share videos with various creative elements. If you’re filming within the app, Reels can be up to 90 seconds long. If you want to post a longer video, up to 15 minutes, you can upload it as a regular post, and it’ll be automatically shared as a Reel.
Reels offer a wide range of tools, such as music, text, stickers, effects, and filters, which can be used to enhance the videos and make them more engaging. Although, the only things you really need to focus on are music and text.
For realtors, using Instagram Reels can be highly beneficial for several reasons:
1. Increased reach and engagement: By consistently posting Reels, realtors can reel in (see what I did there?) a bigger crowd and connect with more potential clients. Reels are shown to a wider audience beyond your followers, and they often capture the attention of users as they are short, visually appealing, simple, and entertaining.
2. Showcasing properties: Realtors can use Reels to showcase their listings. Instead of relying solely on images or long videos, Reels offer a more dynamic way to present a property, highlighting its key features in a concise and visually appealing way. Instead of one long video, create a Reel for each staged room! You can go from posting once about your listing to creating and posting 20 Reels, all with a call-to-action that leads to your website.
3. Demonstrating expertise: Show off your real estate expertise! By creating informative Reels, realtors can demonstrate their years of experience in the real estate market. They can share tips on buying, selling, or investing in properties, helping to establish themselves as knowledgeable professionals in the field.
4. Building brand awareness: Consistent and creative use of Reels can help realtors build their brand and increase their visibility on Instagram. When people start sharing and engaging with your Reels, your realtor game will reach a whole new level of recognition!
5. Capitalizing on trending content: Reels often follow popular trends. Realtors can leverage these trends to stay relevant and connect with a wider audience, potentially gaining more followers and clients.
6. Connecting with the audience: Reels offer a more personal and authentic way for realtors to connect with their audience. By sharing behind-the-scenes moments, success stories, or even fun snippets, realtors can create a more relatable and approachable image.
Now that we’ve successfully convinced you to start using Reels (right?), we’ve listed basic things you need to know about the app so you can spot trends and optimize your posts for the best results.
“How do I start making a reel?”
Told you we’d start with the basics! To start creating a Reel, follow these steps:
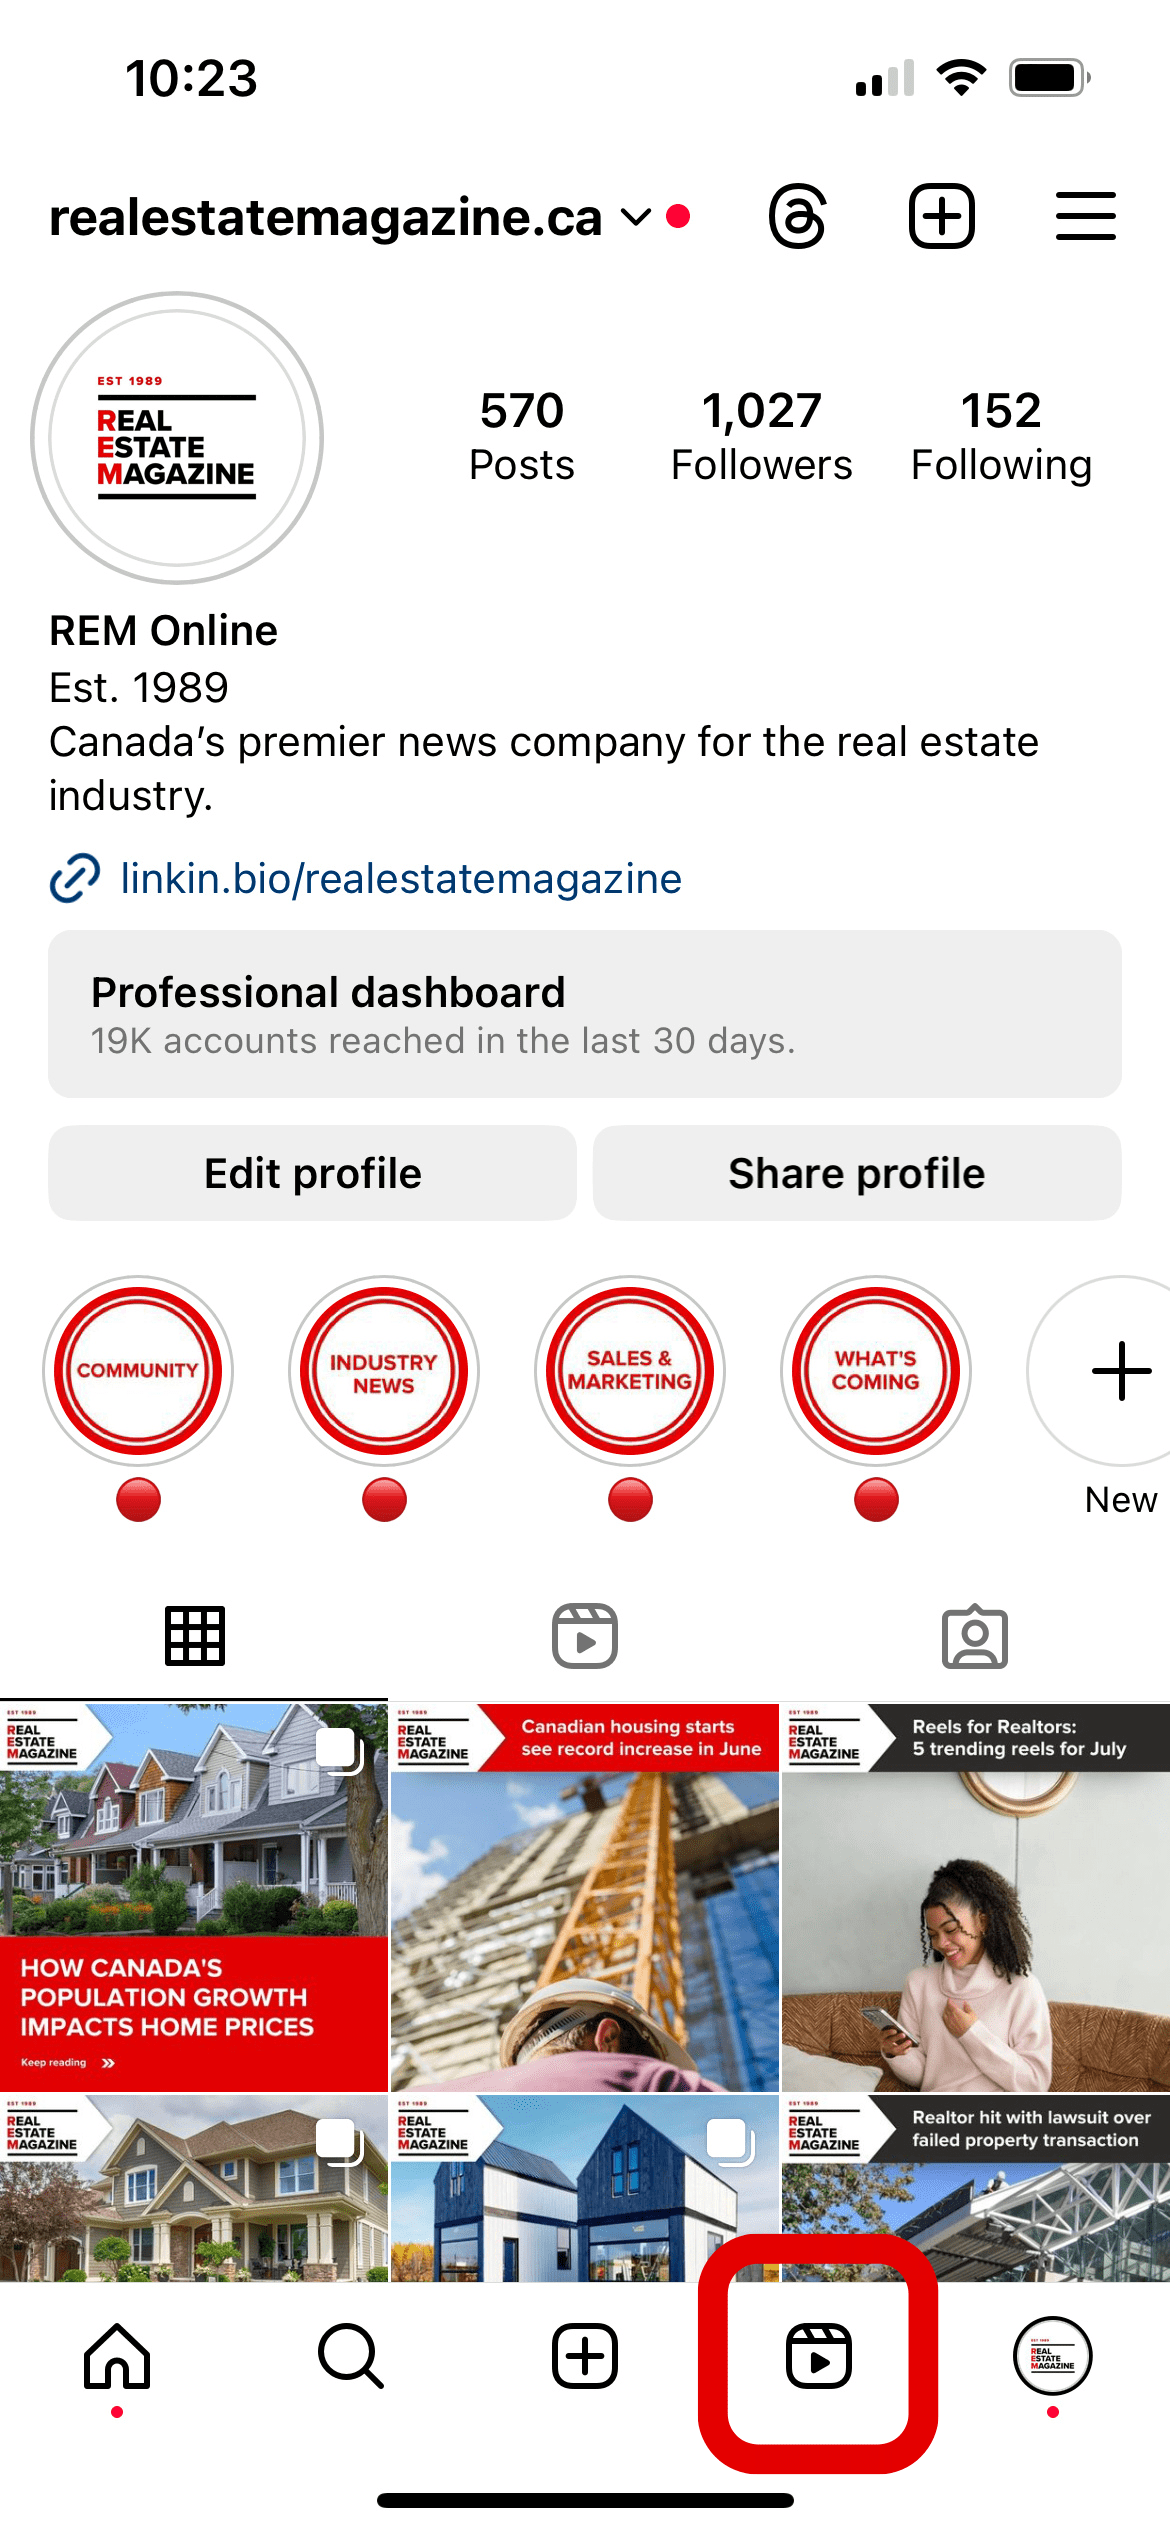
Step 1: Open your Instagram app and tap your profile icon at the bottom right of your screen.
Step 2: Next, tap the + at your screen’s top right or bottom center.
Step 3: Select “Reel.”
Now you know how to start the process of making a Reel. So far, so good! But before we go deeper into what comes next, I want to show you a couple of tricks to find trending Reels and sounds.
“How do I know something is trending?”
An easy way to get more reach with Reels is to jump on trends. There are a couple of ways you can do that.
The first way is to sign up for our newsletter, where you’ll be notified when I publish our monthly Reels for Realtors articles, where I give you 5 trending Reels and/or sounds.
The second way, and one I highly recommend, is to spend time scrolling on the app to see what’s going on. More often than not, whatever Reel trend you start to notice is attached to a specific sound.
“Wait… what’s a sound?”
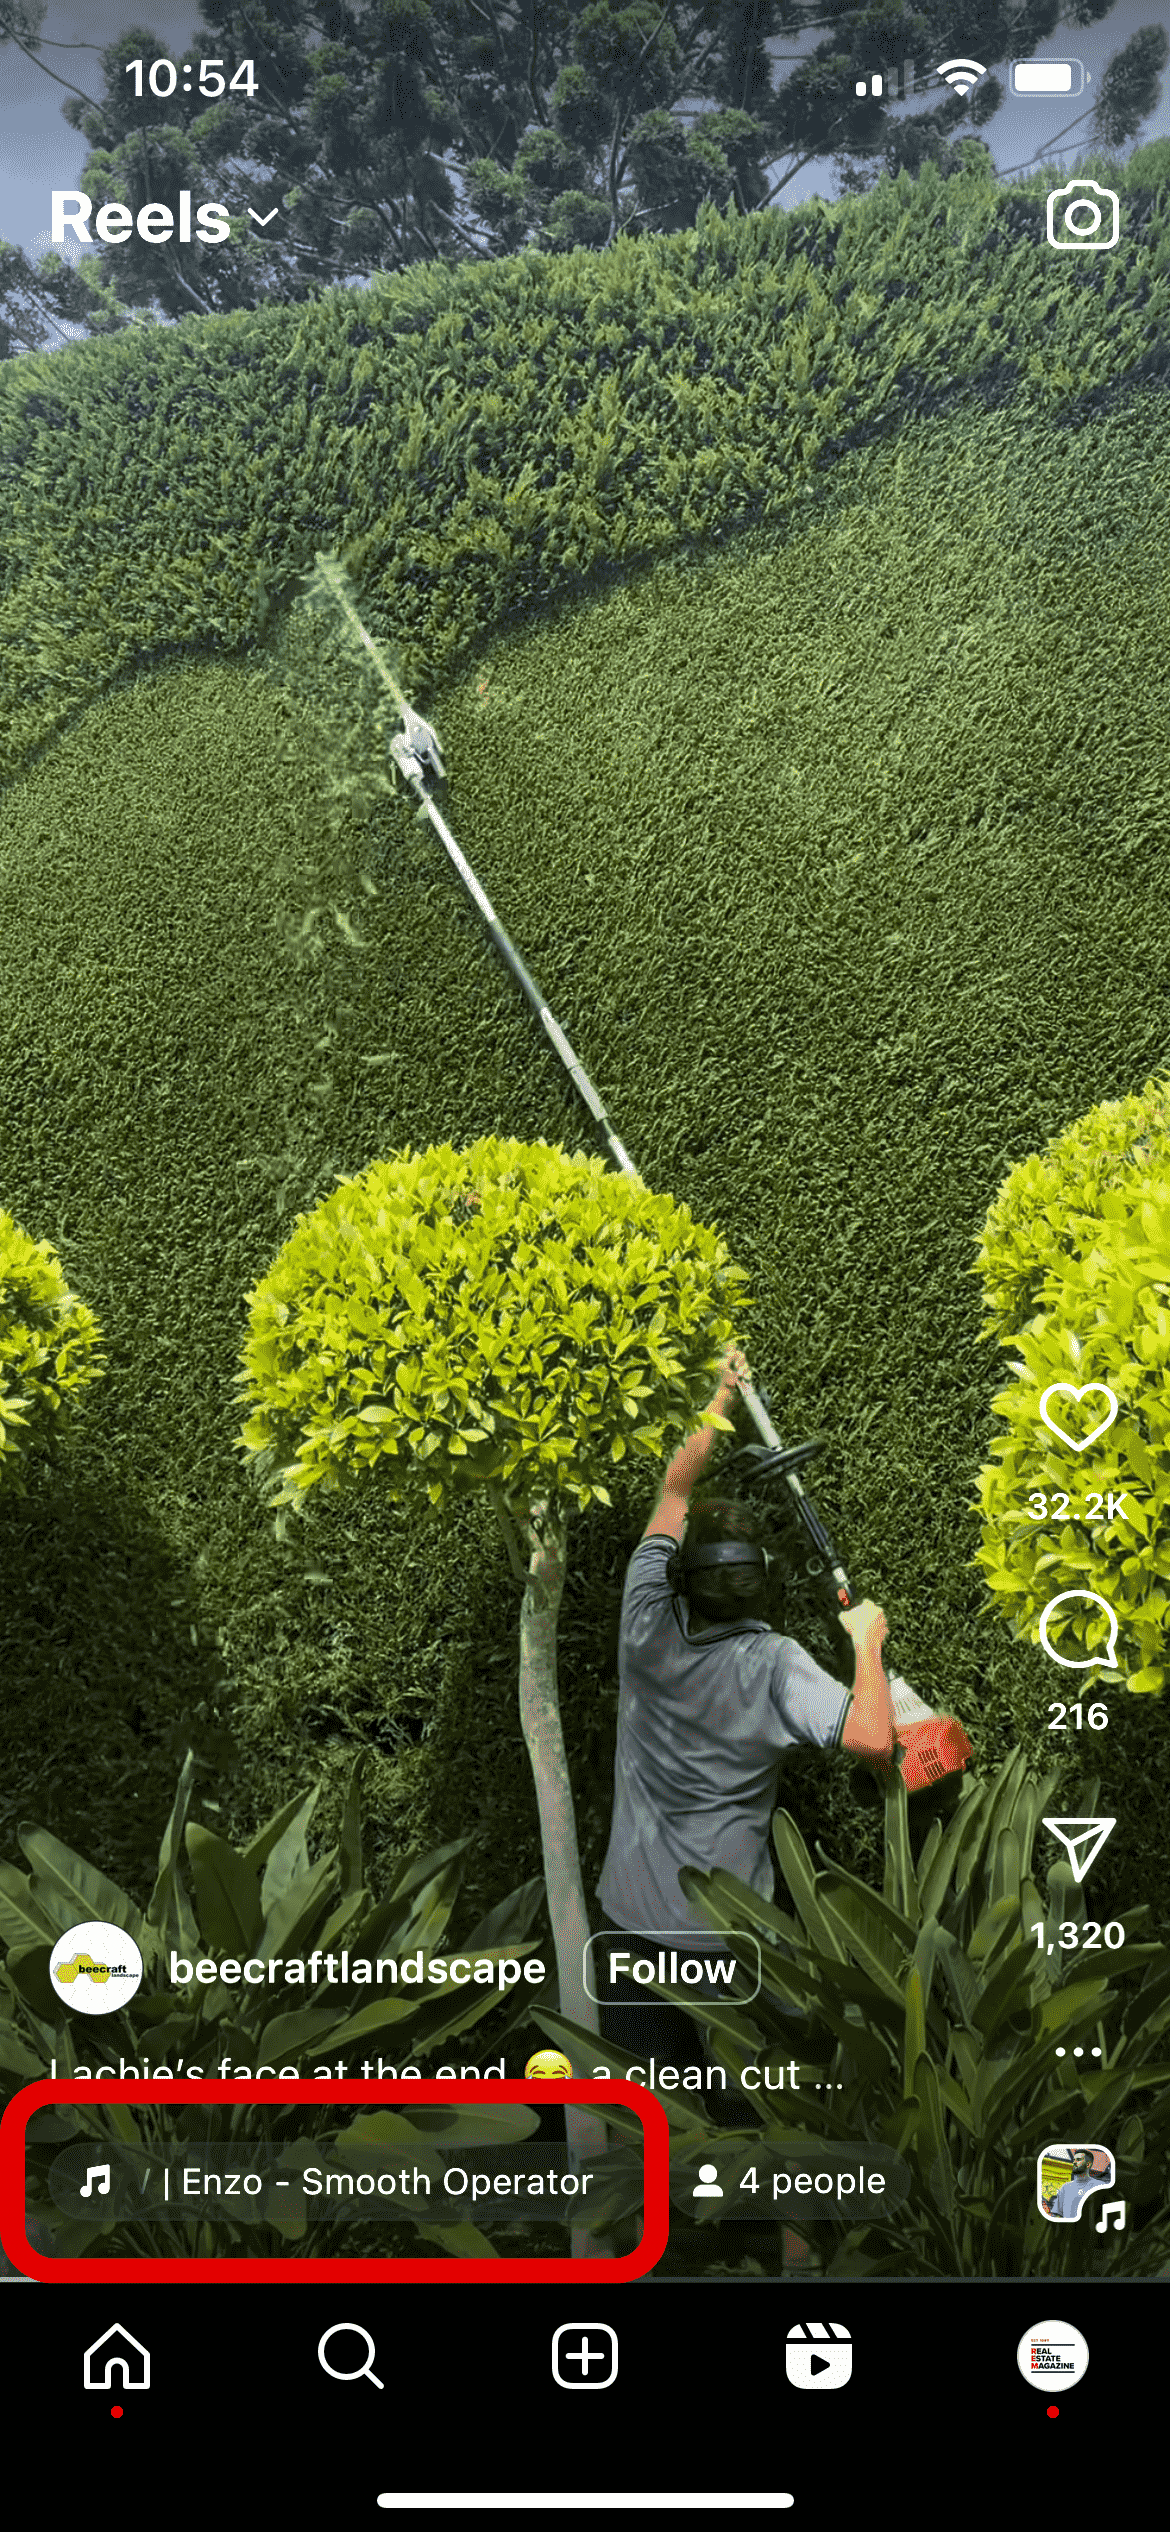
Great question. A sound is what Instagram (and TikTok) call the music or spoken recording you hear while the Reel is playing. Sometimes it’s just background music, sometimes the video is timed to the specific sound playing, and other times people lipsync to the song or spoken recording. You’ll find it listed at the bottom left of the Reel.
“Listen, that’s great, but I don’t have time to sit there and scroll forever until I spot something that is trending.”
I get it, realtors are reel busy people (ha, I did it again!), but that’s why I’m here to give you the tricks needed to speed up and make the process easier.
How to spot a trending sound
It’s easy. Here’s how:
Step 1: Open the app and tap the Reels icon.
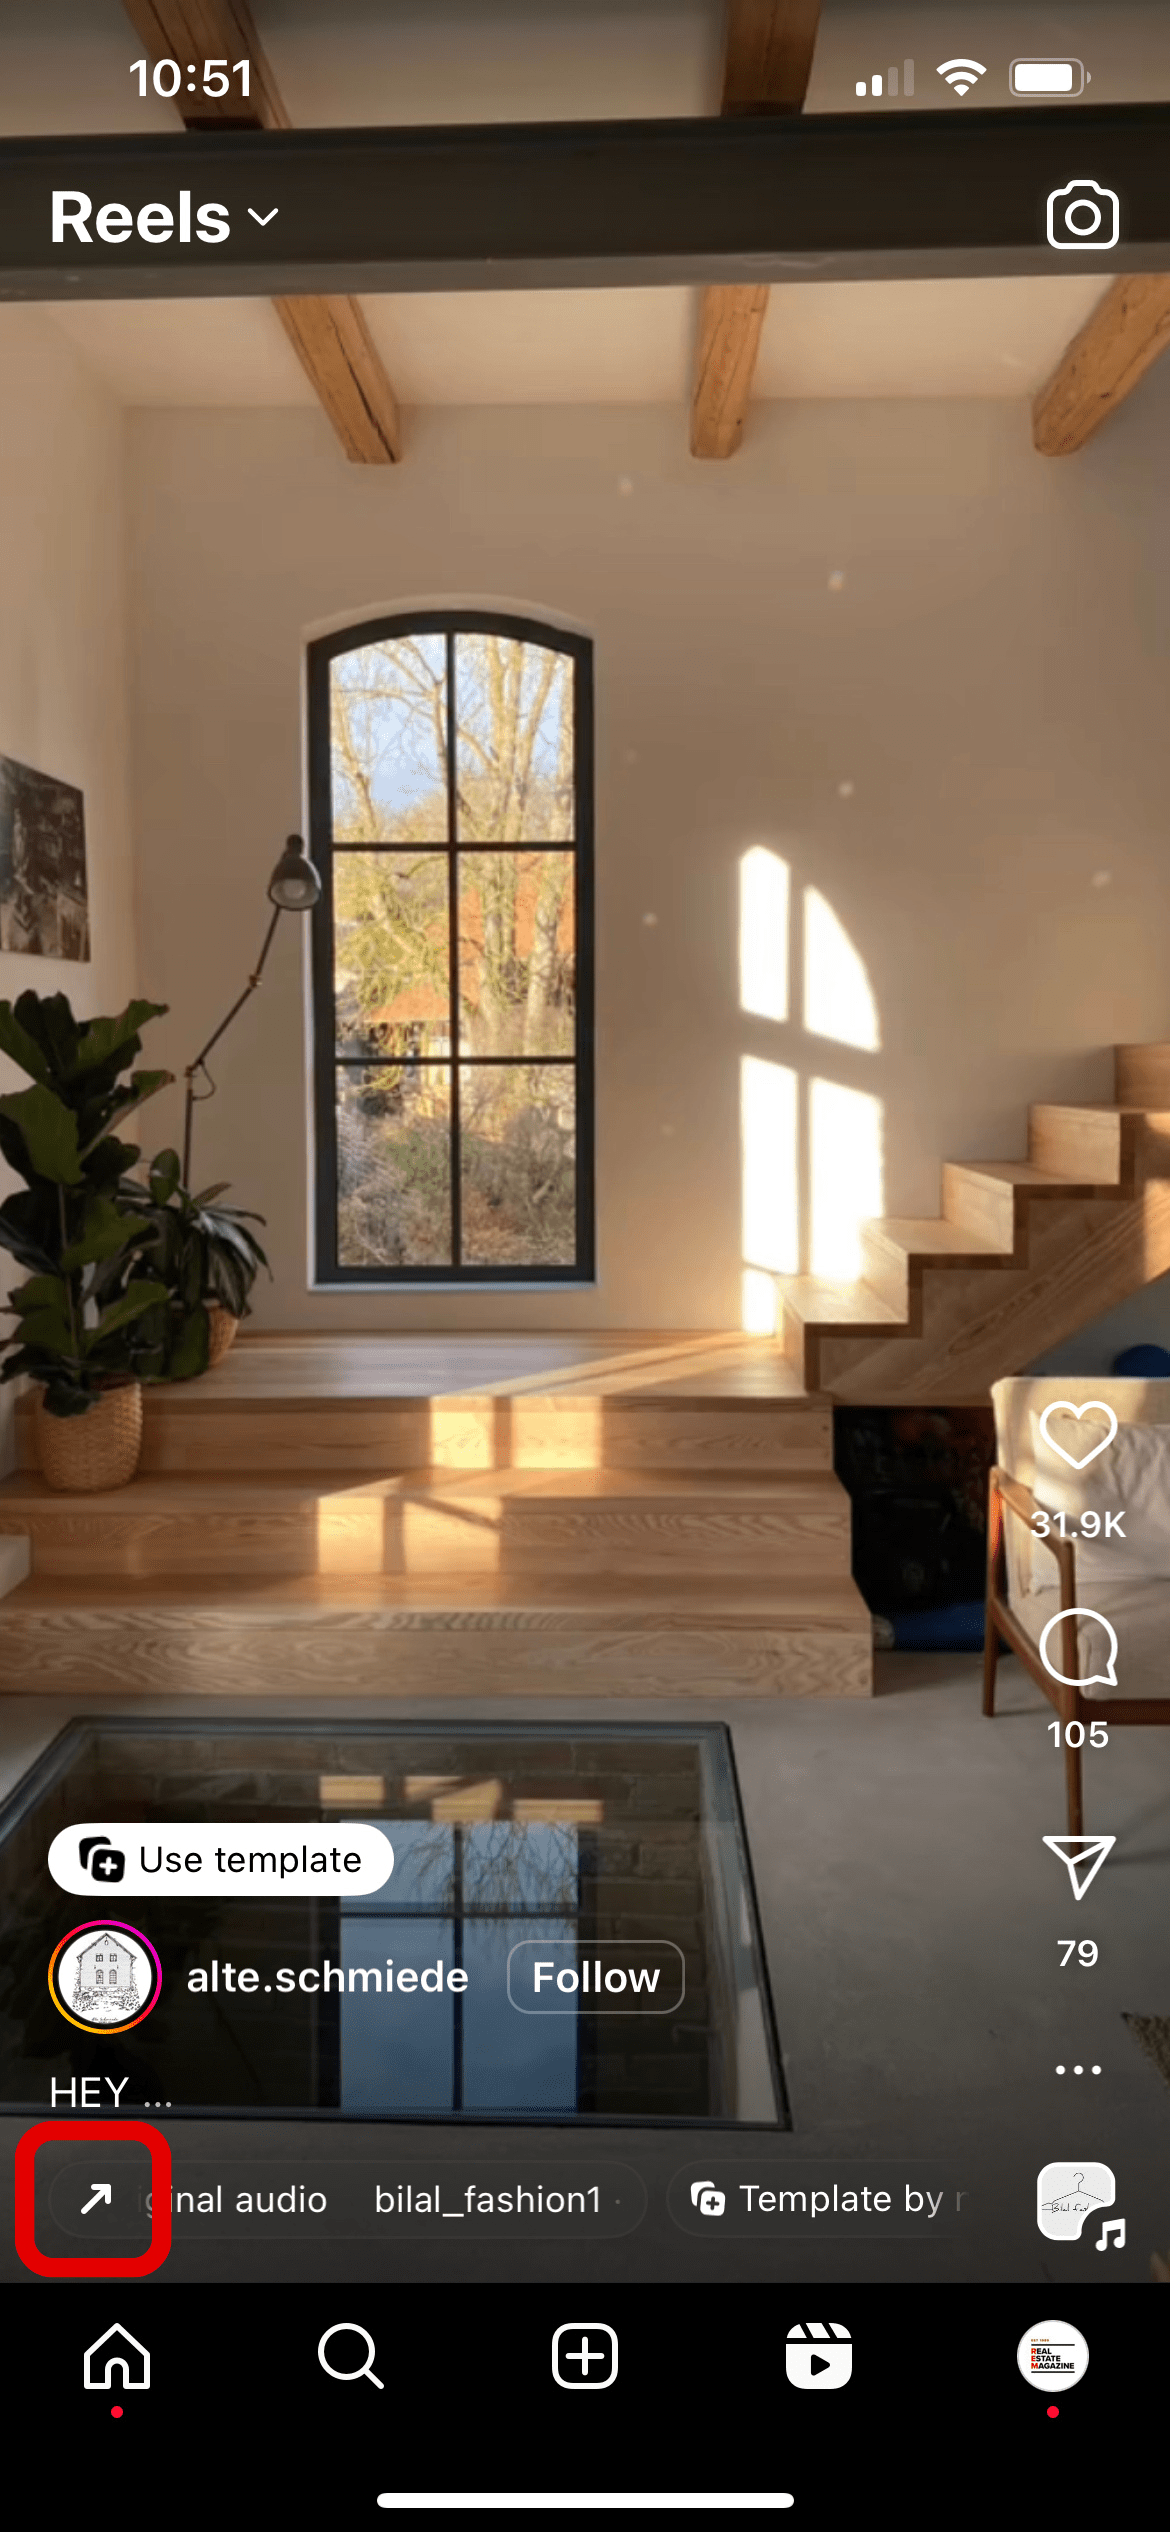
Step 2: Keep scrolling until you spot an arrow next to the sound being used.
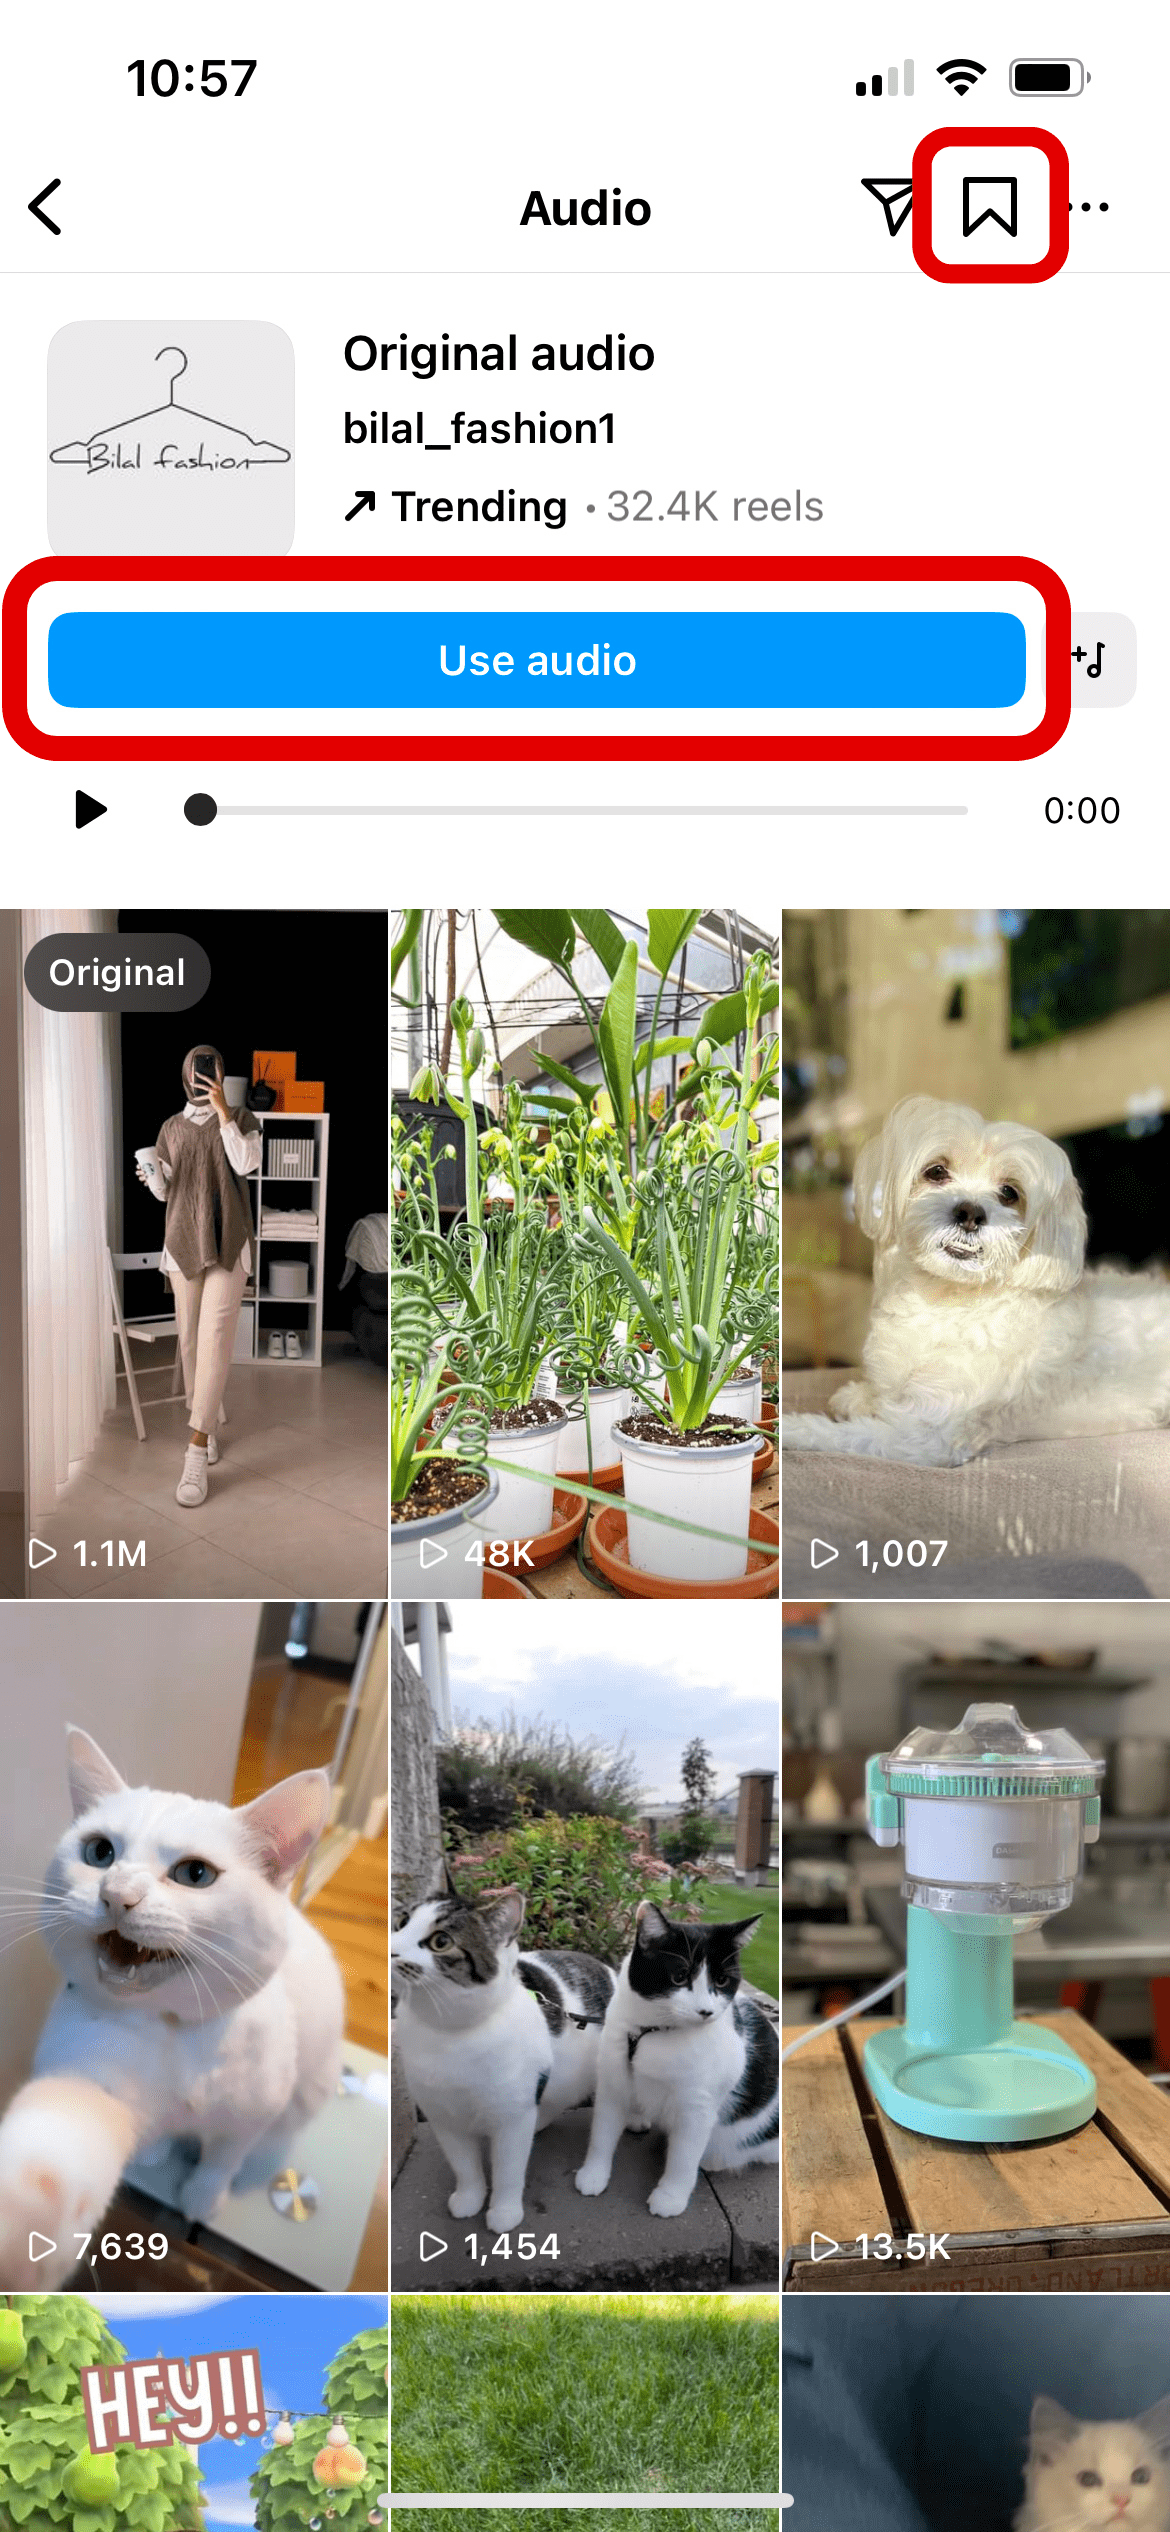
Step 3: Tap the trending sound. Here you can either use it right away or save it for later. You can also scroll down and spot any other videos that are in the real estate industry and have used this same sound for some inspiration!
“Okay, I’ve got the sound, but editing the video so the clips match perfectly to the music seems really tedious. Is there an easier way to do this?”
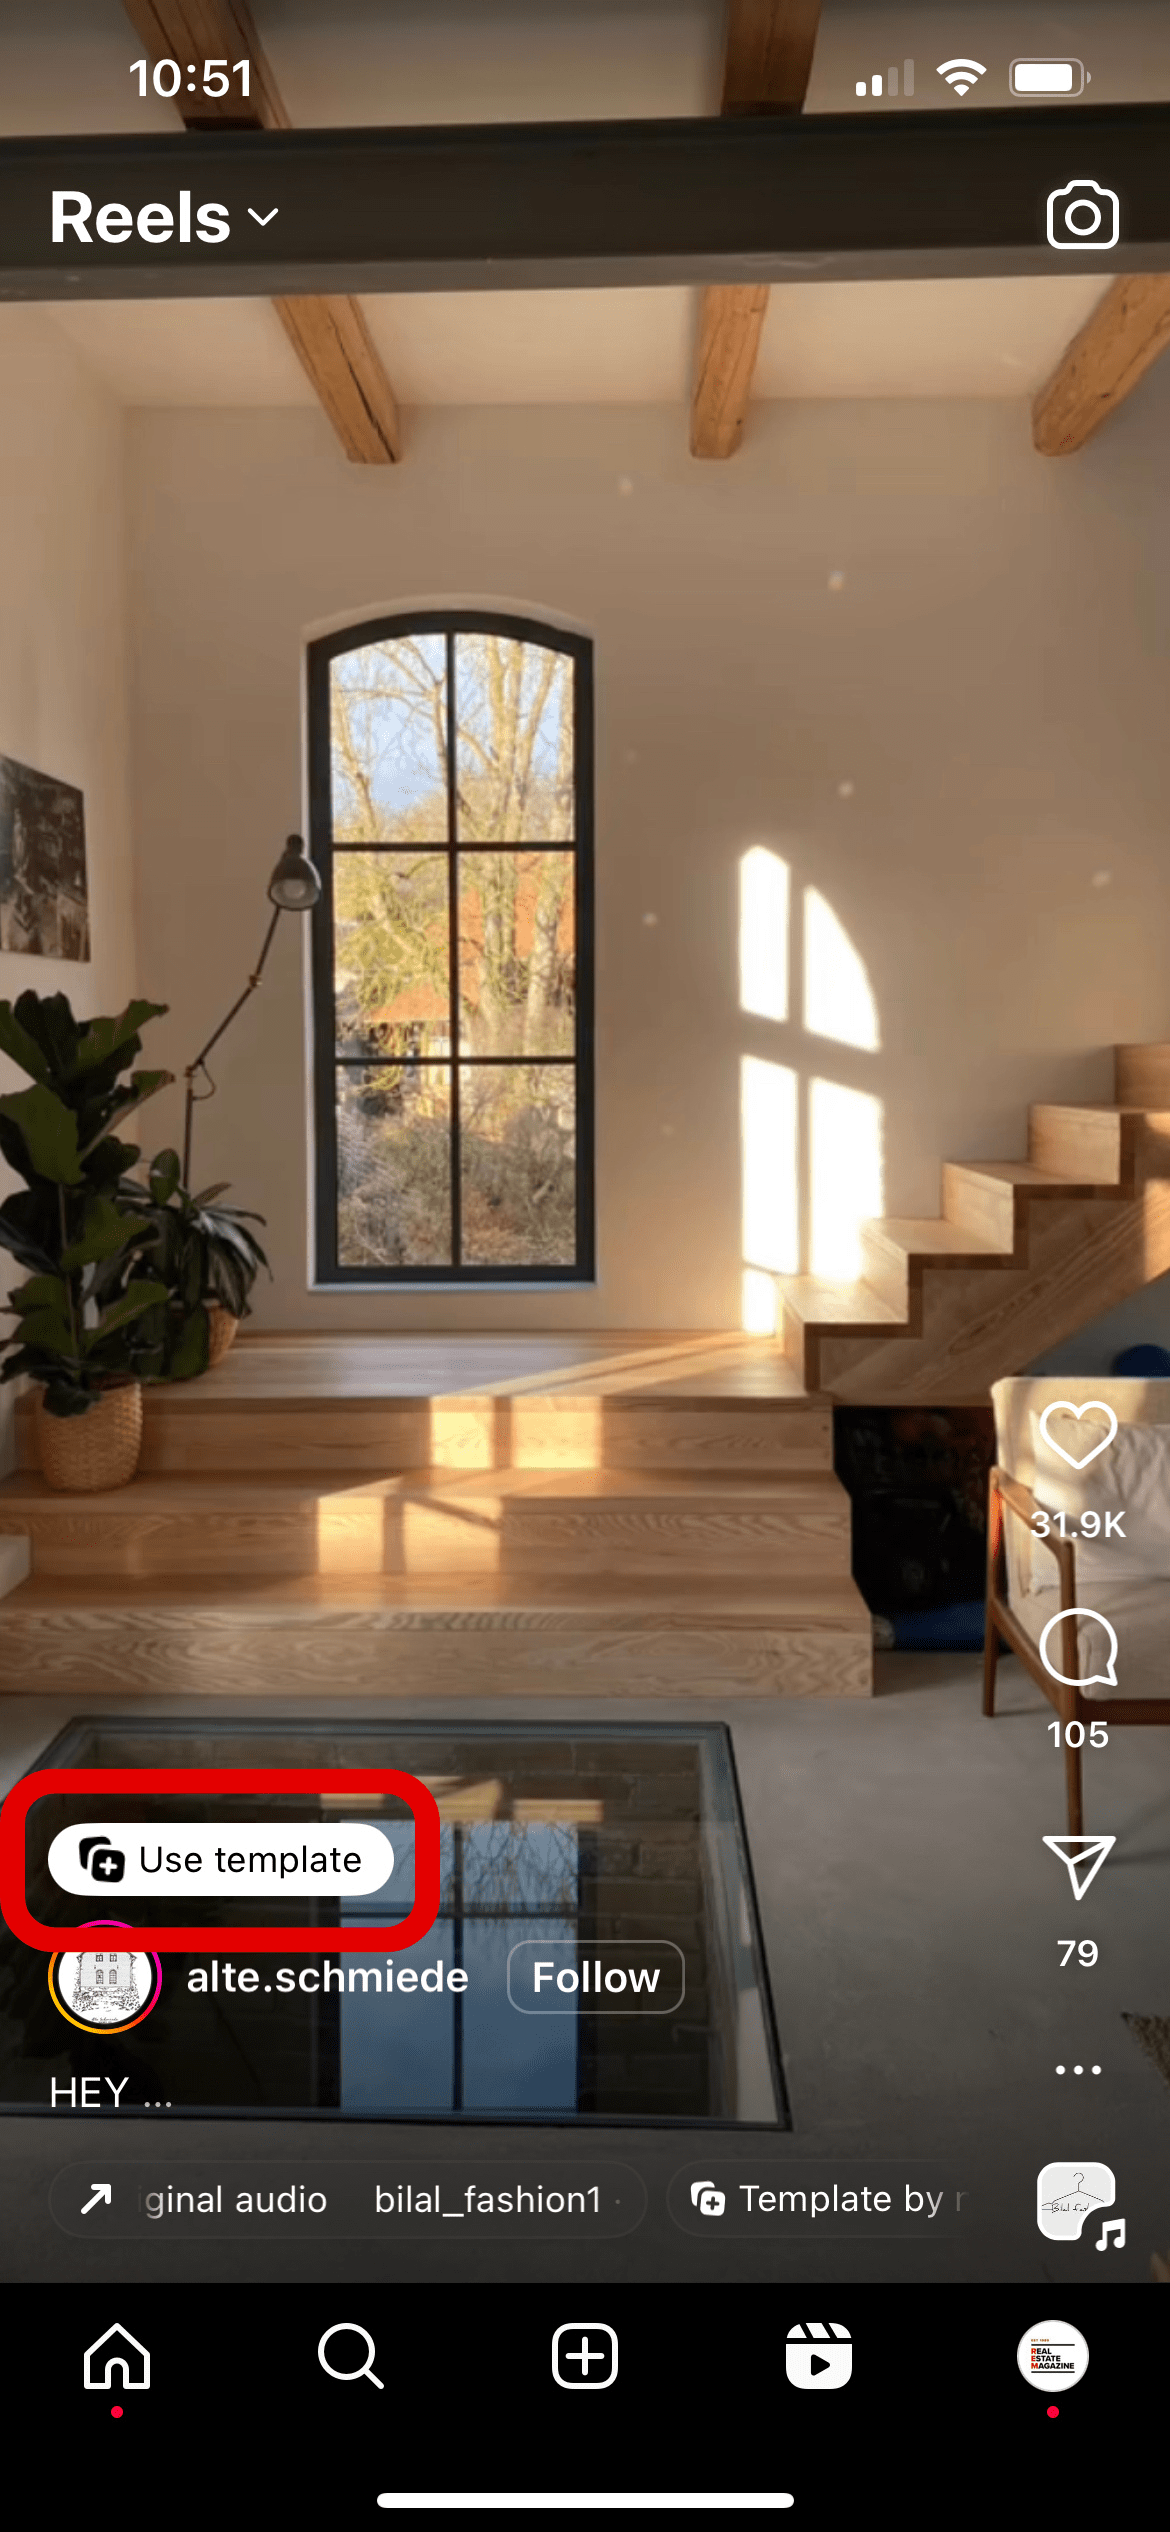
Again, great question. And yes! There is an easier way to do that. Let’s take a look at this image again, shall we?
You’ll notice a button that says “Use template”. Let’s tap that.
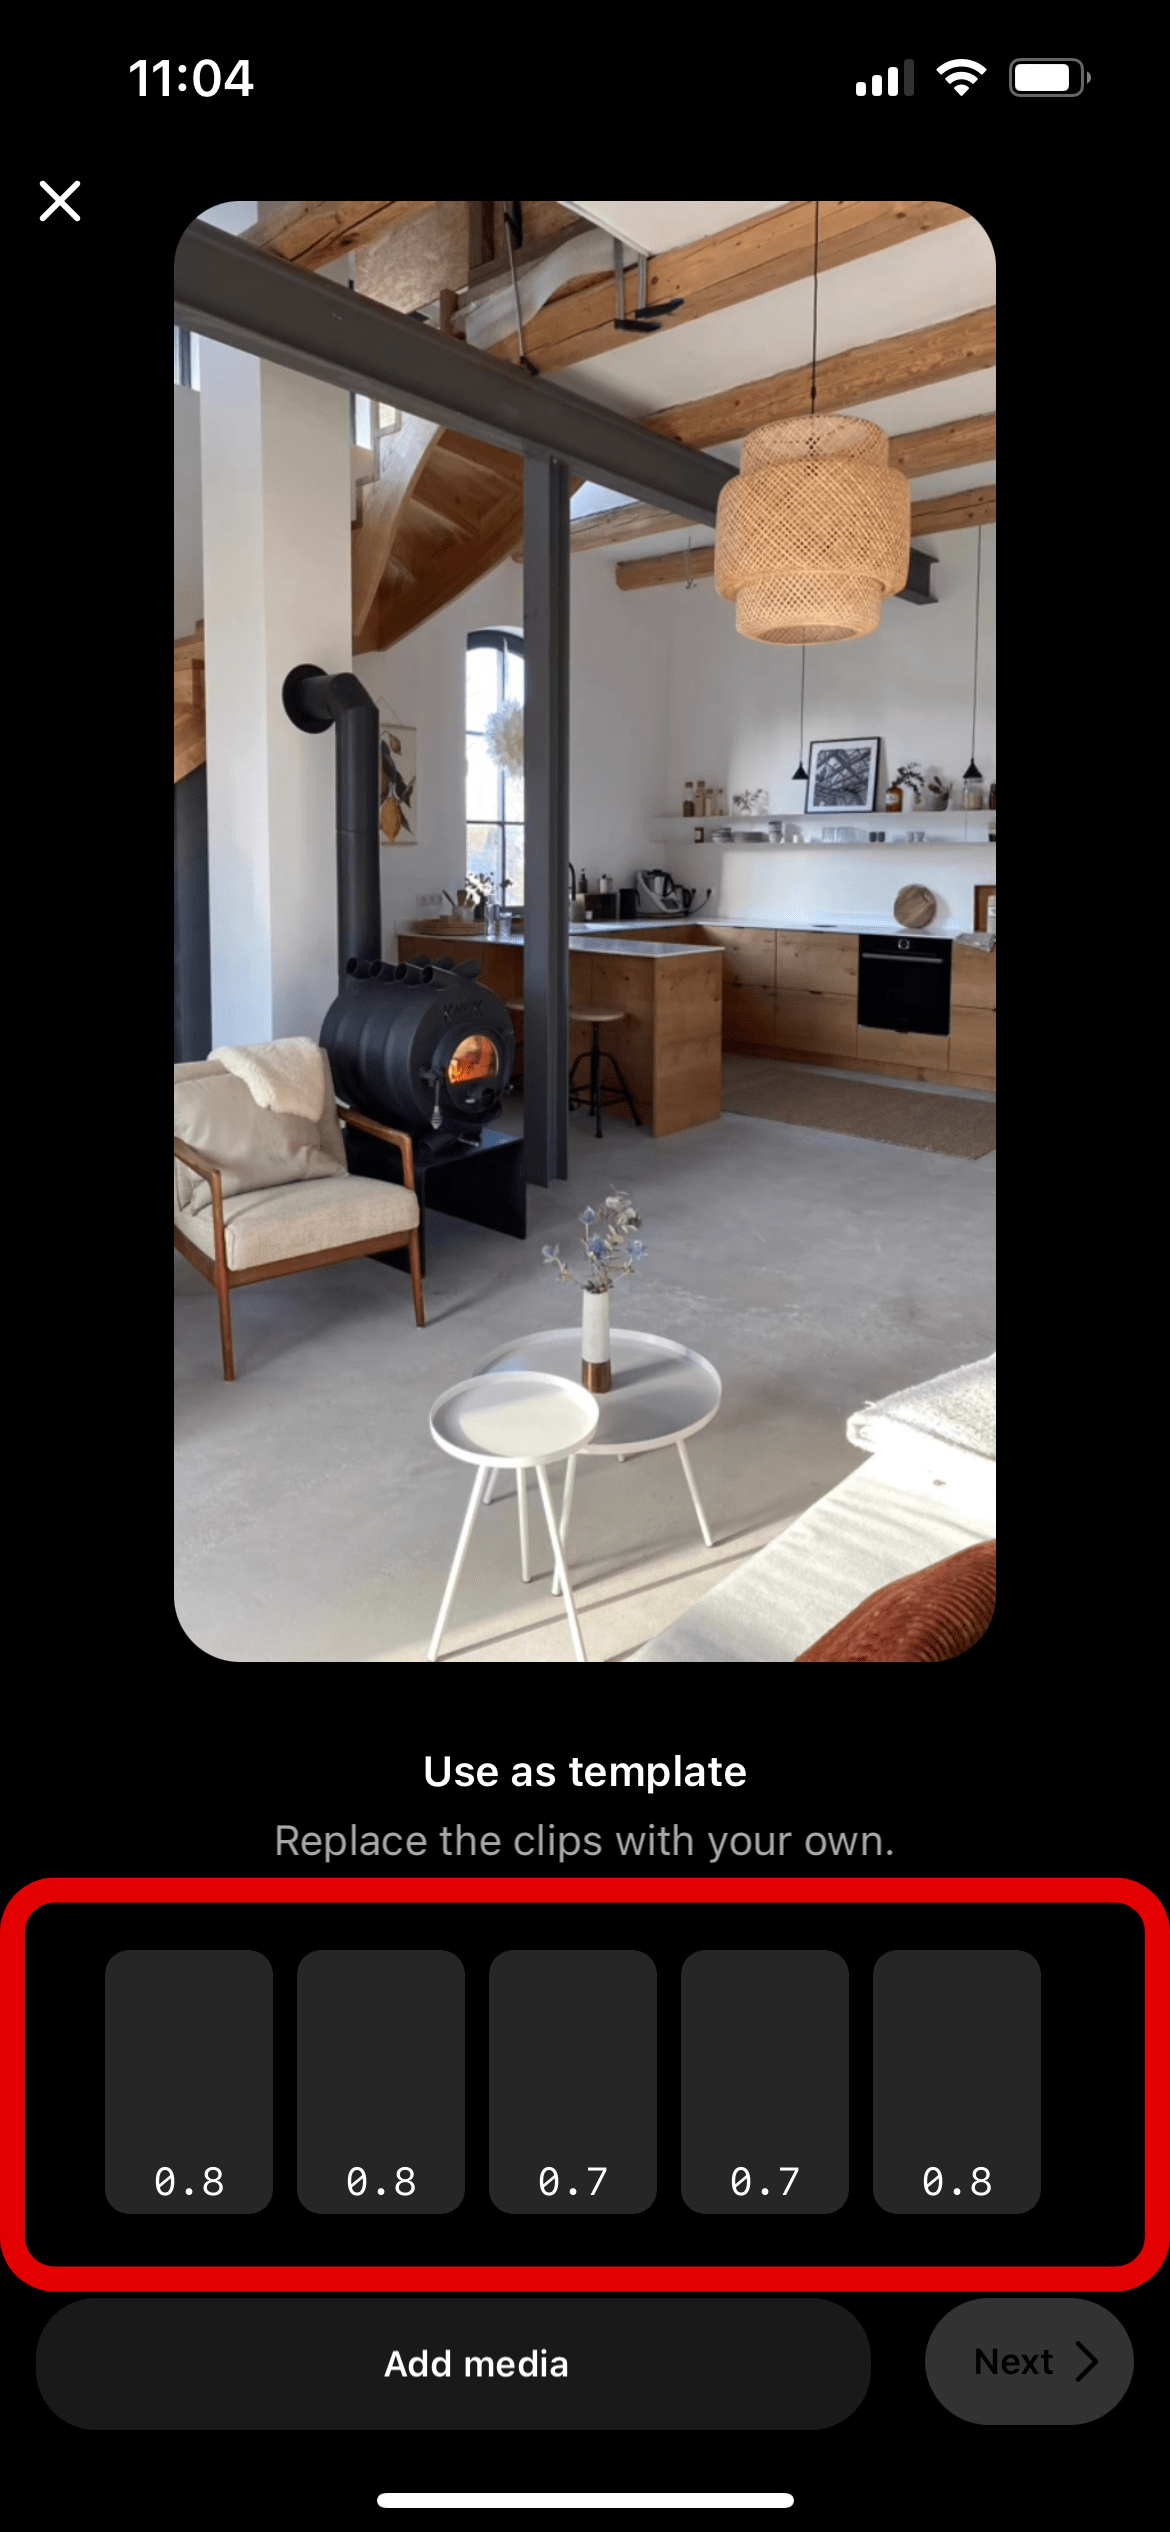
As you can see, Instagram has set it up, so all you need to do here is add the media you’d like to use for this Reel. And by tapping “Use template,” the trending sound that goes with it is automatically added to the Reel you’re creating.
“Can I create my own template?”
WOW. You are really coming in hot with the awesome questions today.
What’s great about Reels is you can promote your listings in an endless amount of ways. You can take the footage that was recorded for your listing and split it into a ton of Reels. You can create a Reel for each area of the home using trending sounds!
But you can also create your own templates that you can reuse over and over and over again, whether you choose to use a trending sound, a non-trending sound (those still do well, too!), or your own sound!
Click here to check out Instagram’s how-to article on creating your Reel template!
“Great! Is that it? Are we done?”
Nope! Having a fantastic, entertaining, quality Reel is a good start, but you need to optimize the way you’re posting to not only reach as many people as possible but to ensure your Instagram Feed is looking amazing and you’re leading people to the link in your bio to get in touch with you.
With that being said, here are a few more tips to make sure your next Reel is polished and ready for success:
Add a cover image
Ideally, when people see your Reel, they’ll feel compelled to tap on your handle, learn more about you, and hit the follow button. I always tell people to think of your feed as your storefront. If it looks good and inviting, people will come in. If it looks messy, most people will walk over to the next shop.
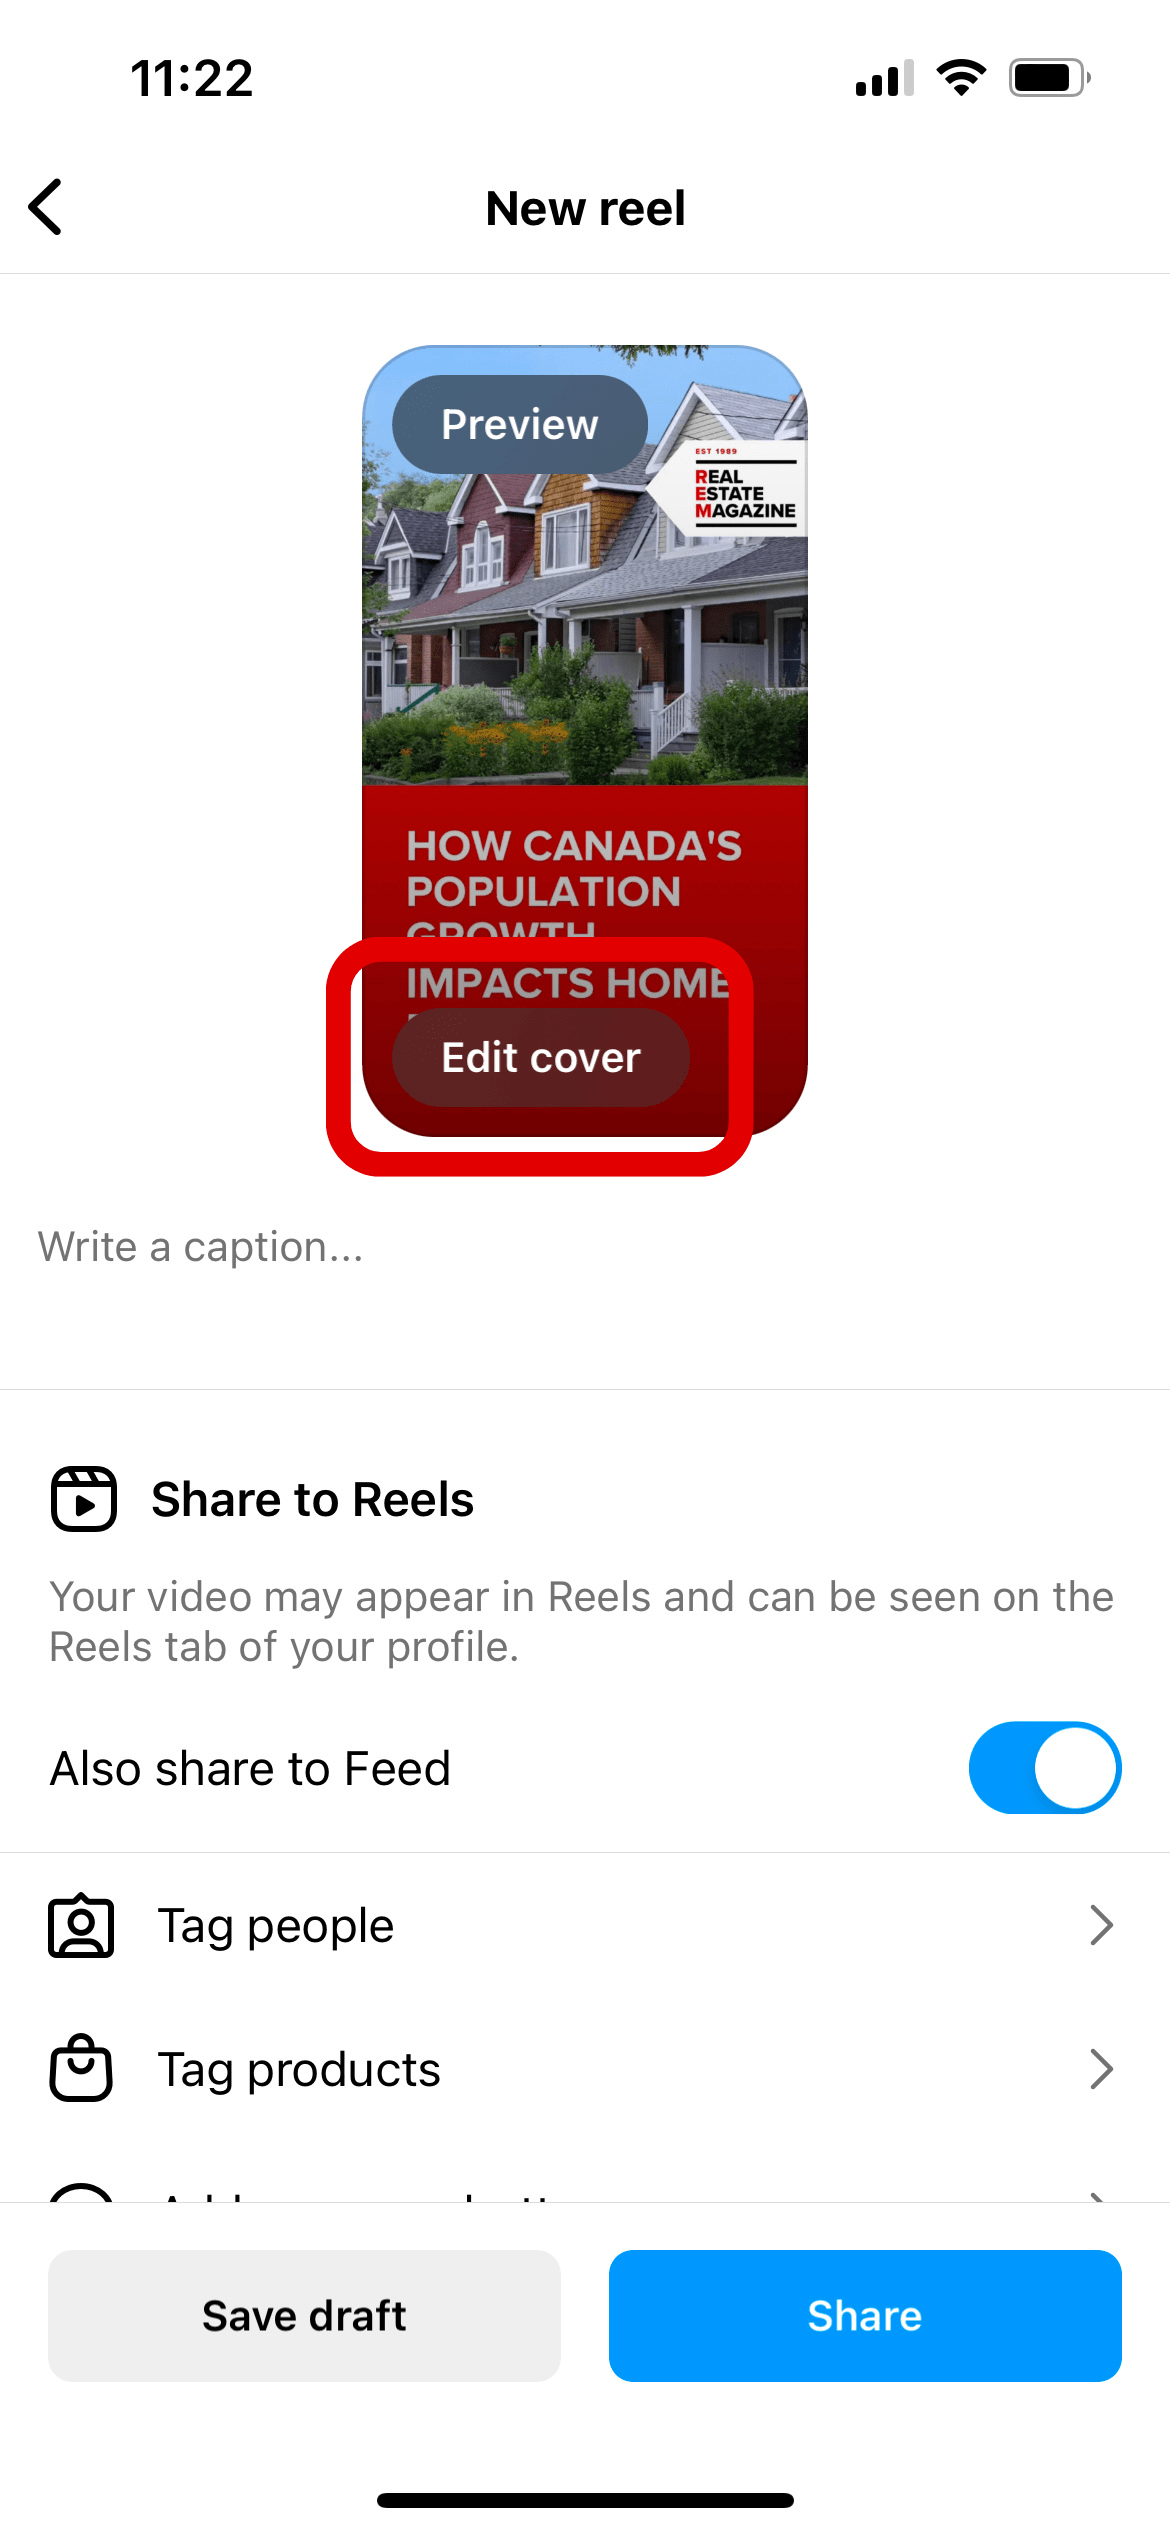
Once you’ve created your Reel and you’ve made it to the last section where you input your caption, make sure you upload a branded cover with text that lets people know exactly what they’ll be looking at or use the slider to select a part of the Reel that’ll make a nice cover image.
Always add a caption
It’s pretty surprising how many times I’ve seen Reels added without captions. Yes, sometimes there’s text on Reels, so you may be thinking, what’s the point? The point of your Reel caption is to lead people back to your profile. Especially if you’re showing off your latest listing, ideally, viewers are heading over to your profile to tap the link in your bio and learn more about the home.
So be sure to add a short (because people do not go to Reels to read blog posts) and a sweet caption with a clear CTA. Grab people with fun facts about the home! That and your entertaining Reel will leave people wanting more.
Hashtags
Alright, this one’s a little tricky. If you ask Instagram’s CEO, they’re moving away from hashtags entirely and focusing on the copy written in your caption and your Reel. Yep, the text you add to your Reel gets soaked in by the algorithm to show your content to people who interact with similar posts!
When it comes to regular, static image posts, Just Sell Homes tested out using no hashtags vs. using 10-12 hashtags. The posts WITH hashtags continued to do better. When it comes to Reels, honestly, it’s still up in the air. There’s no clear sign as views and engagement are so up and down for both. What I’d recommend is to use location specific hashtags to help the algorithm show the content to people in your area.
The idea is to test it out. If it doesn’t do much, switch up your tactics and see if that works better.
Sharing to feed
If you share your Reel to your feed, Instagram will show your Reel to your audience and to new people in the Reels feed. It will also show up on your regular feed AND your Reels feed.
I’d recommend testing this out too. I’ve found that if I share my Reel to my regular feed, I get less reach. If I only share it to the Reels feed, my numbers tend to go up. That being said, if you have a solid following already, you may see a better reach by sharing it to your feed for your followers to see. Again, something to test out and see what the results look like.
Don’t forget your location!
Because your content is so specific to the area you serve in, you want to make sure you include the Reel’s location. Whether it’s a specific area your latest listing is in or a more general area, you’re giving the latest market stats about. Show the algorithm exactly where your audience is!
You did it!
Phew! You did it. You’ve learned the very basics of creating your first or optimizing your next Reel. Now you need to make yourself your favourite beverage, have a seat, and start creating!
I’d love to see what you’ve made! Be sure to link your Reels in the comments below. And if you have any questions, leave those below, too! I’ll be checking in to offer any help I can.

Hi, I’m Jen and I’m a social media marketer with Just Sell Homes & REM. I’d love to have a clever bio written for you but it’s just not my strength. What I can do is teach you how to create a social media strategy customized to you and show you how to put it into action. Whether you’re just looking to refine the strategy you’ve got or you’re, shall we say, technically/social media challenged? Either way, I’ve got your back.


